CLOSE
Search - Quick Tips

Thank you! Your submission has been received!
Oops! Something went wrong while submitting the form.


Back to articles
Getting Started

Adding and assigning a new calendar in Outlook

Use this guide ONLY if you...
- Already have a dedicated DocketCalendar email account (i.e: docketcalendar@yourlawfirm.com)
- AND
- Have already linked and permissioned that account in DocketCalendar
Introduction
DocketCalendar connects to a single email in your Outlook domain, called the "linked email account."
This account is used to log into DocketCalendar and can place events on any calendar inside your domain that has granted it edit privileges. This guide will help you understand how to properly share and connect calendars to DocketCalendar using Outlook.
Types of Email Accounts
- Linked Email Account: The email account used to log into DocketCalendar (e.g., docketcal@yourlawfirm.com).
- User Calendars: Individual calendars of firm members (e.g., john@yourlawfirm.com).
- Firm Calendar: A central shared calendar for the entire firm (optional).
Important Notes
- When setting up DocketCalendar, you must share each user's personal calendar with the linked email account, not the other way around. This is crucial for proper functionality.
- The linked email account's calendar is not necessarily your "Firm Calendar." You may continue using your existing central shared calendar.
Prerequisites
Before proceeding, ensure that you:
- Already have a dedicated DocketCalendar email account (e.g., docketcalendar@yourlawfirm.com)
- Have already linked and permissioned that account in DocketCalendar
Step-by-Step Guide to Sharing Calendars
Creating a case

Share calendar with your linked email account

NOTE: This step will require the credentials (or attention) of the person holding the account you would like to add.
They will need to share their calendar in Outlook (i.e: judy@yourlawfirm.com) to the dedicated DocketCalendar email account (docketcalendar@yourlawfirm.com)
They will need to share their calendar in Outlook (i.e: judy@yourlawfirm.com) to the dedicated DocketCalendar email account (docketcalendar@yourlawfirm.com)
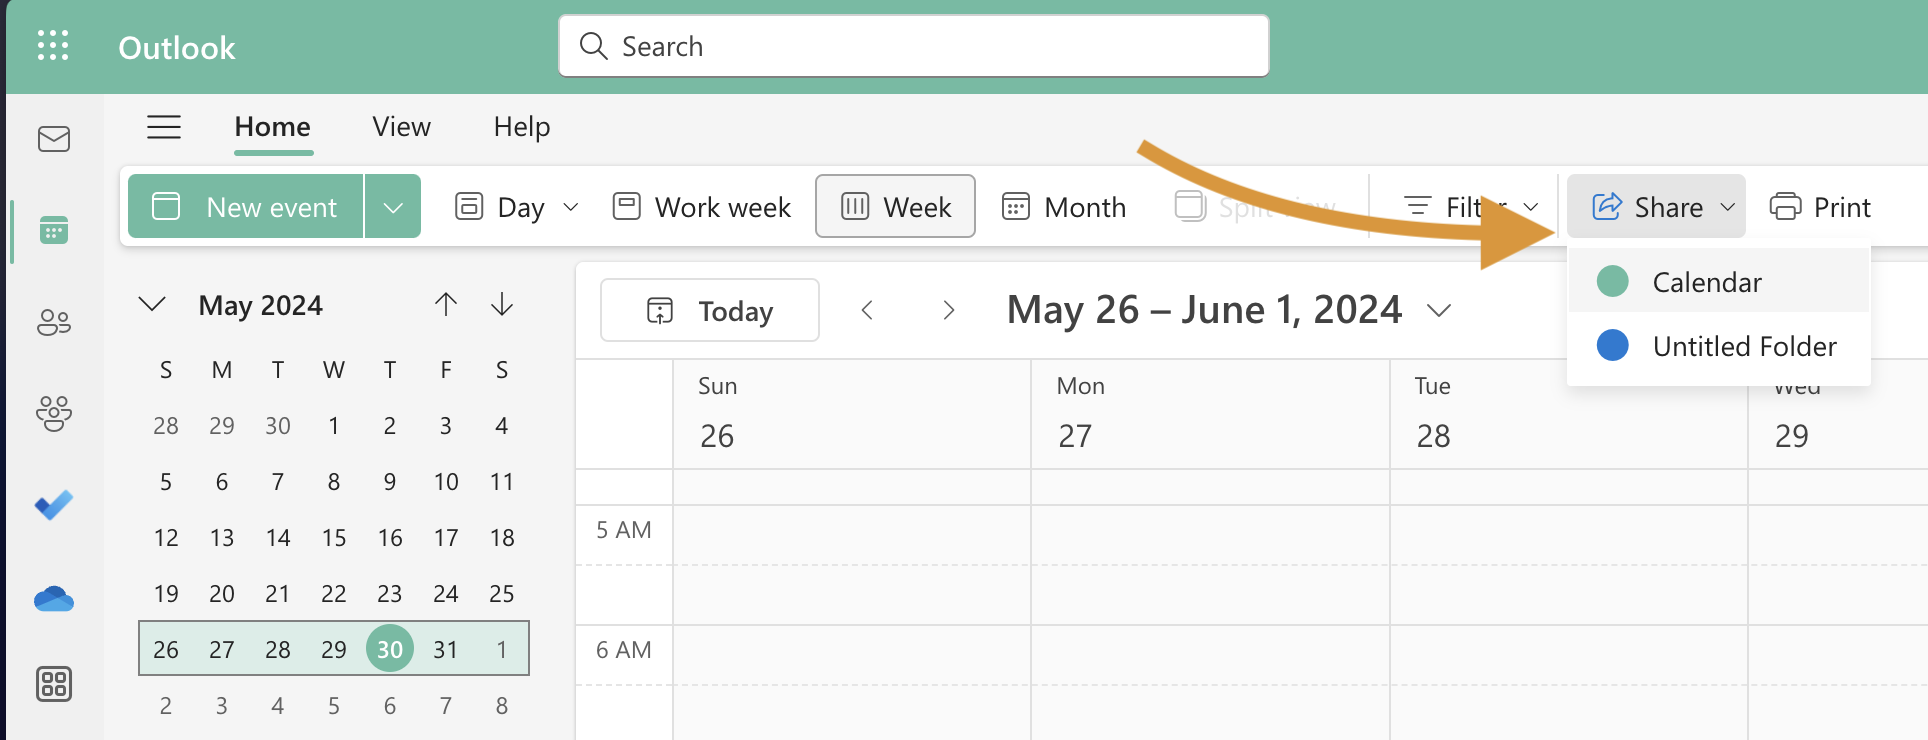
From the Outlook calendar of the email account you'd like to add, select the calendar you would like to share.
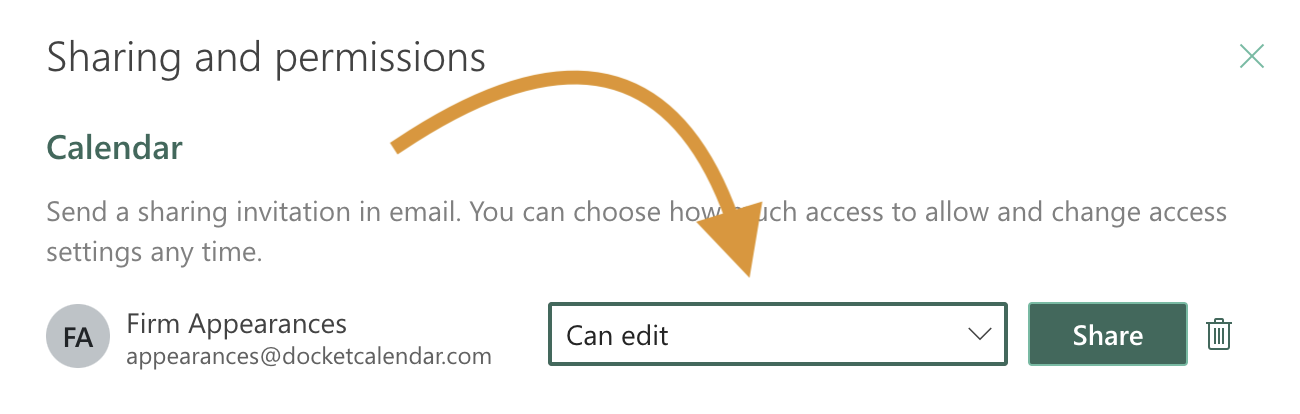
Add the email address of your dedicated DocketCalendar account.
Don't forget to select 'Can edit' from the permissions drop down.
Don't forget to select 'Can edit' from the permissions drop down.
Creating a case

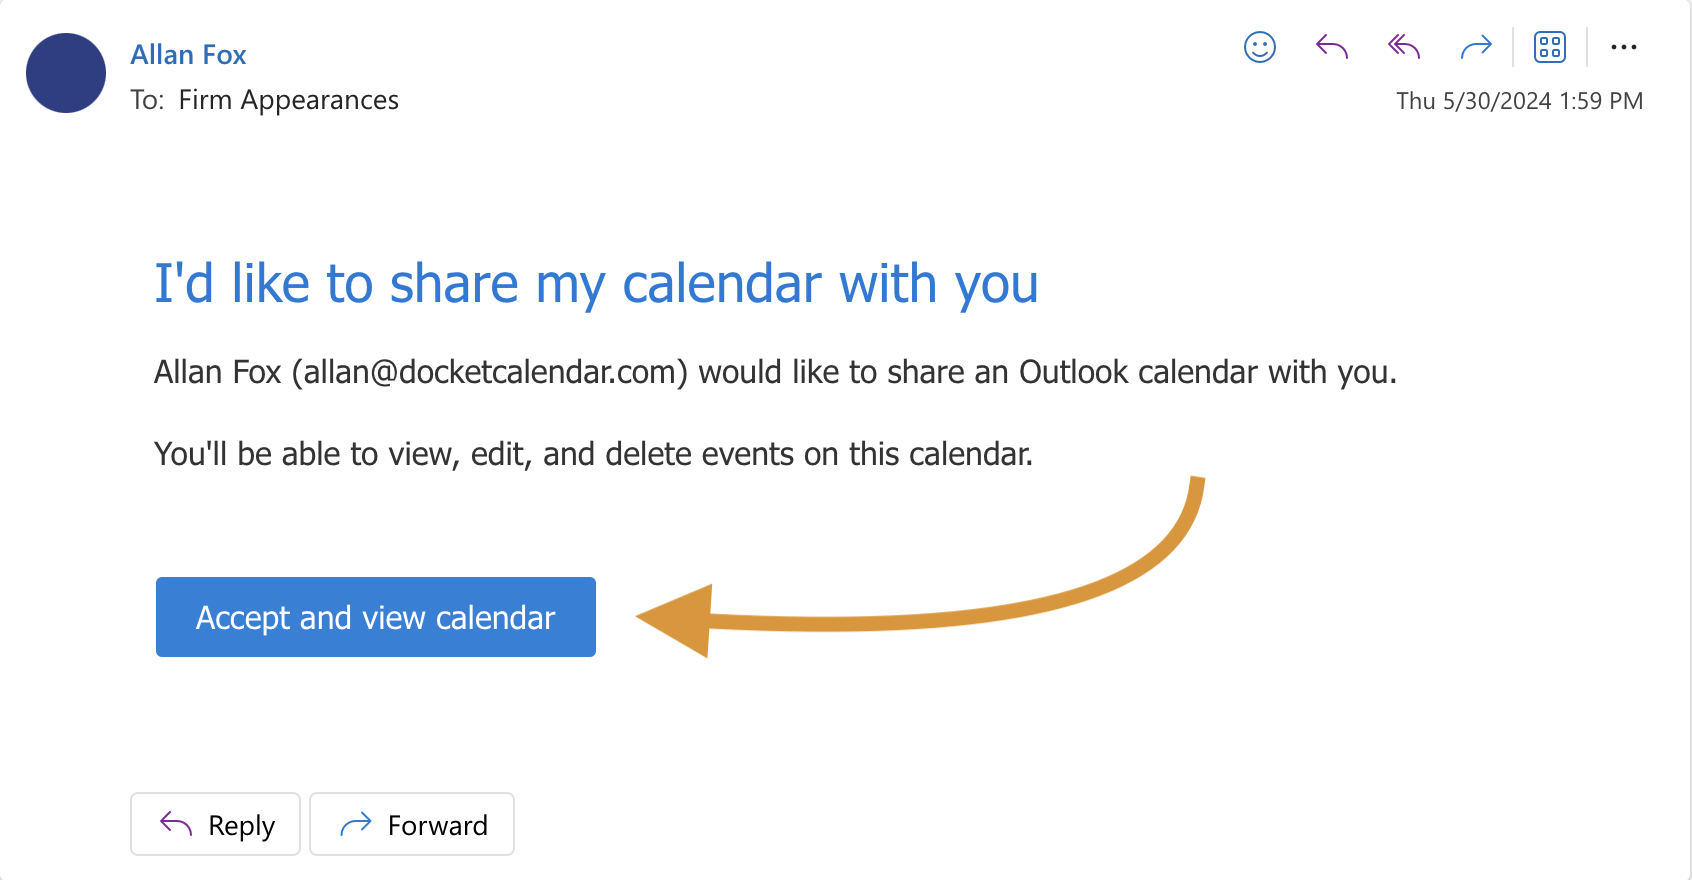
Accept calendar invite in linked account
Now log in to your dedicated DocketCalendar email account. In your inbox you should see an email regarding the new calendar share. Click 'Accept.
Creating a case

Create User + Assign newly shared calendar

Click the Users Icon on the Side Panel
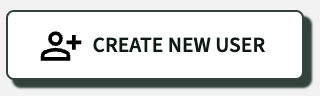
Select "Create New User" at the top of the screen

- Enter the user's email address (must be unique)
- Fill in the required information, including user type and permissions
- Now that you've connected to Outlook or Google, you'll see an option to "Assign Link Calendar"
- Click "Save" to create the user
Note: The new user will receive an email with login credentials and a temporary password. They'll be prompted to create a new password upon first login.
Testing Calendar Sharing
To ensure the calendar is shared correctly:
- Open the linked email account in Outlook.
- Create a new event.
- Check the calendar dropdown next to the "Save" button.
- If the user's calendar appears in the dropdown, the sharing is set up correctly.
Troubleshooting
If a user's calendar doesn't appear in the dropdown when creating a new event from the linked account:
- Double-check that the user has shared their calendar with the correct email address.
- Ensure that edit permissions were granted when sharing.
- Try removing and re-adding the calendar sharing permissions.

Back to top ↑
